Tutorials
Salesforce
How to create a dashboard in Salesforce
How do I create a dashboard in Salesforce?
On the Dashboards tab, click New Dashboard, name it and click Create. Click + Widget, choose Chart or Table, pick the source report and click Select. Choose how to display it, click Add, then Save and Done.
- Open the Dashboards tab and click New Dashboard.
- Name the dashboard, pick a folder if you need to, and click Create.
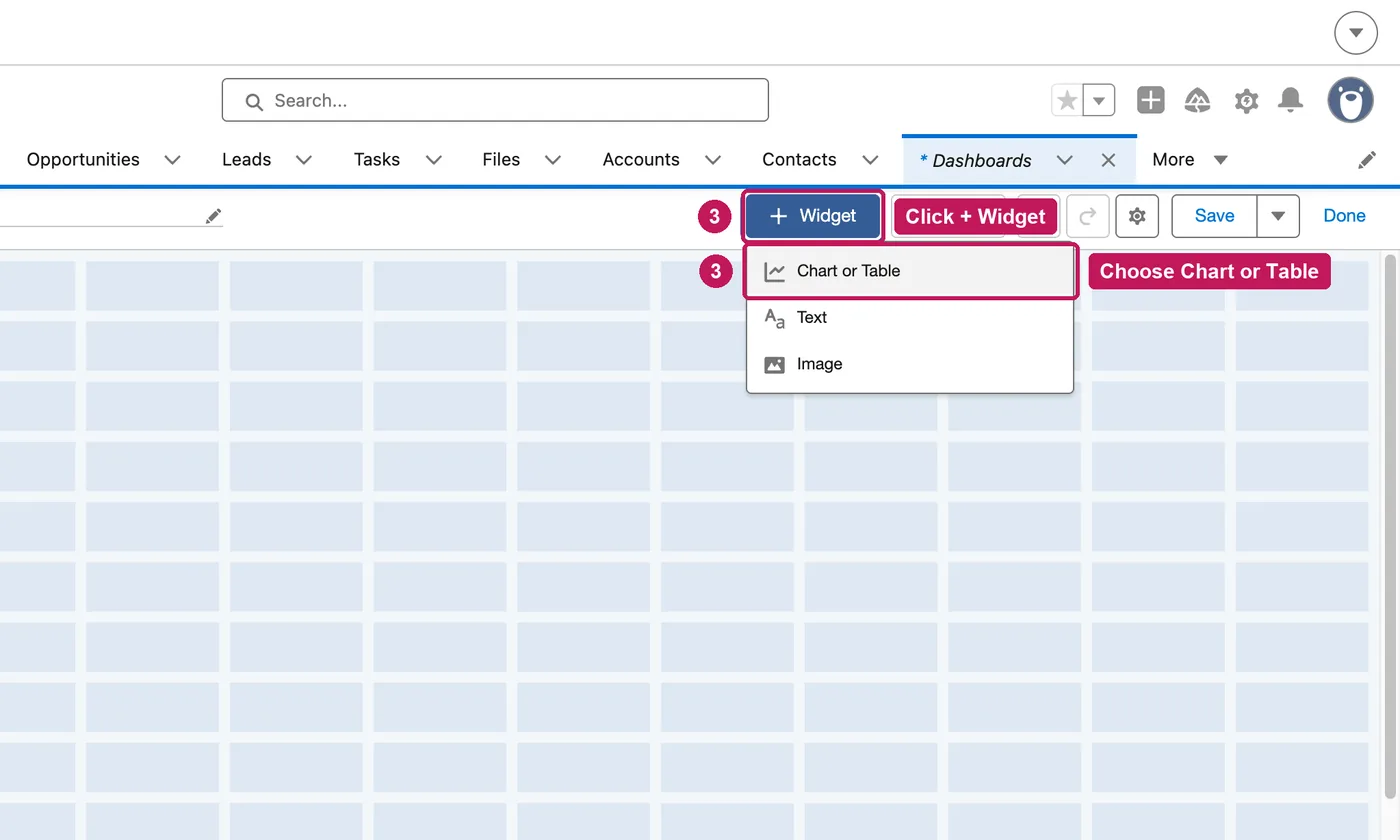
- Click + Widget, then Chart or Table.
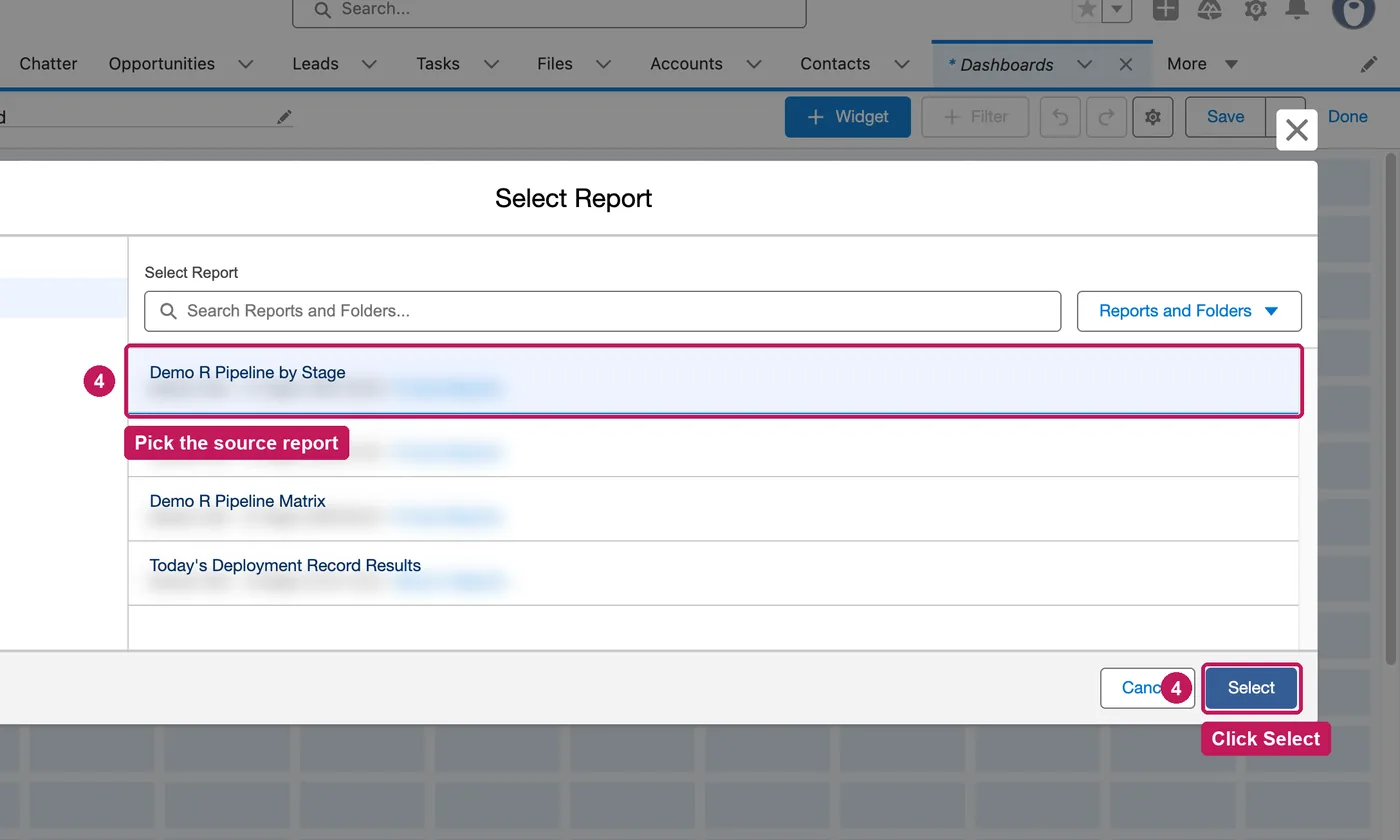
- Pick the source report and click Select.
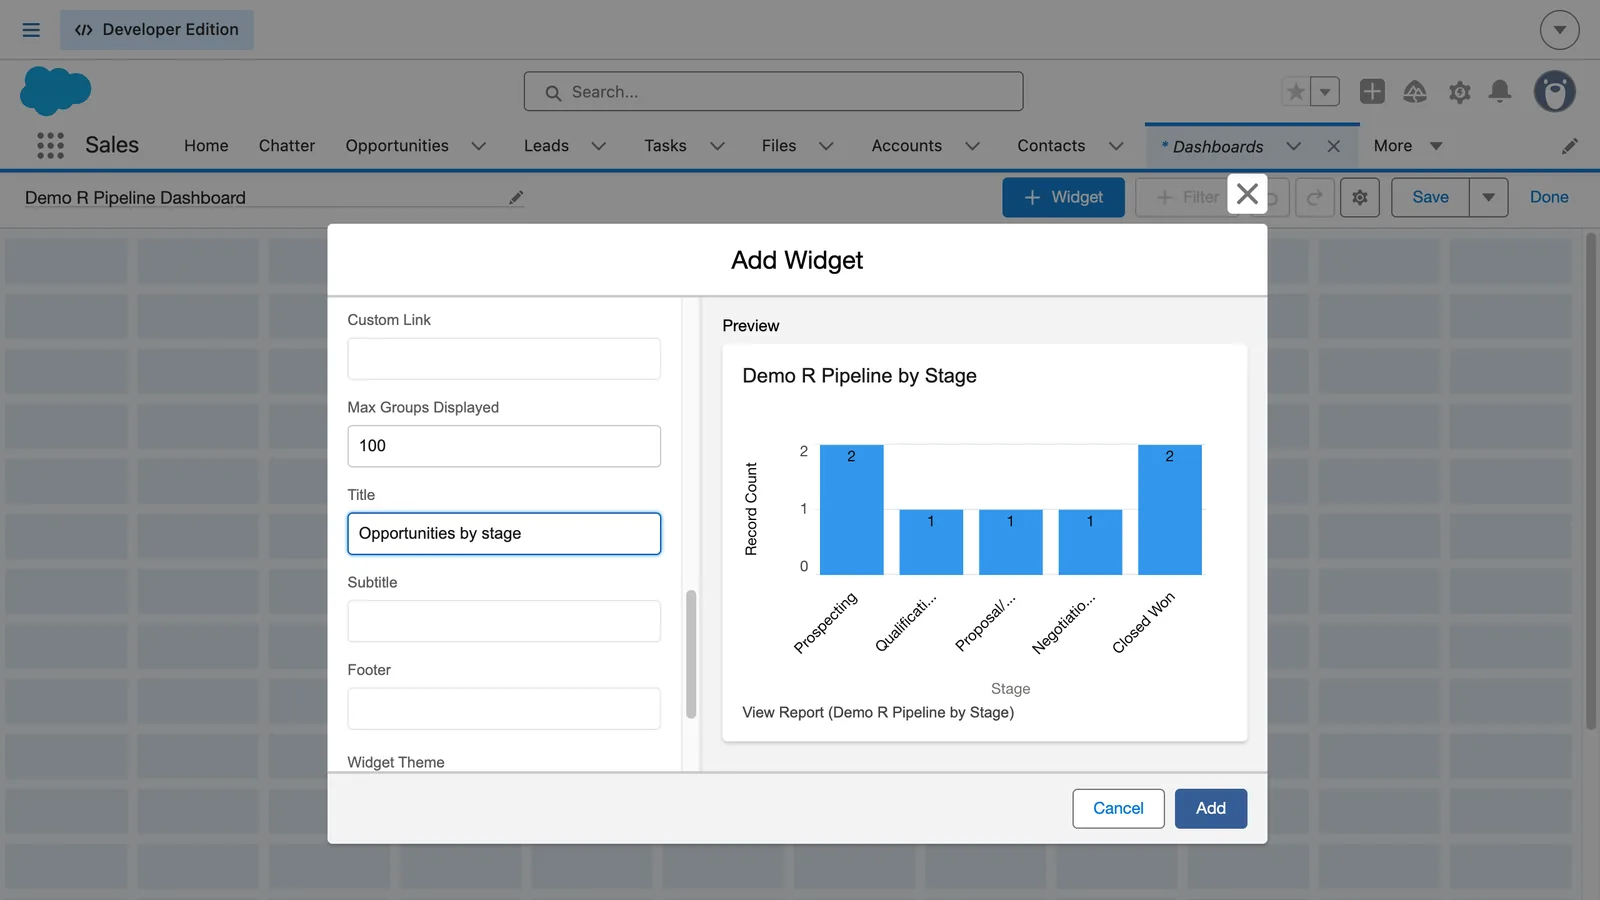
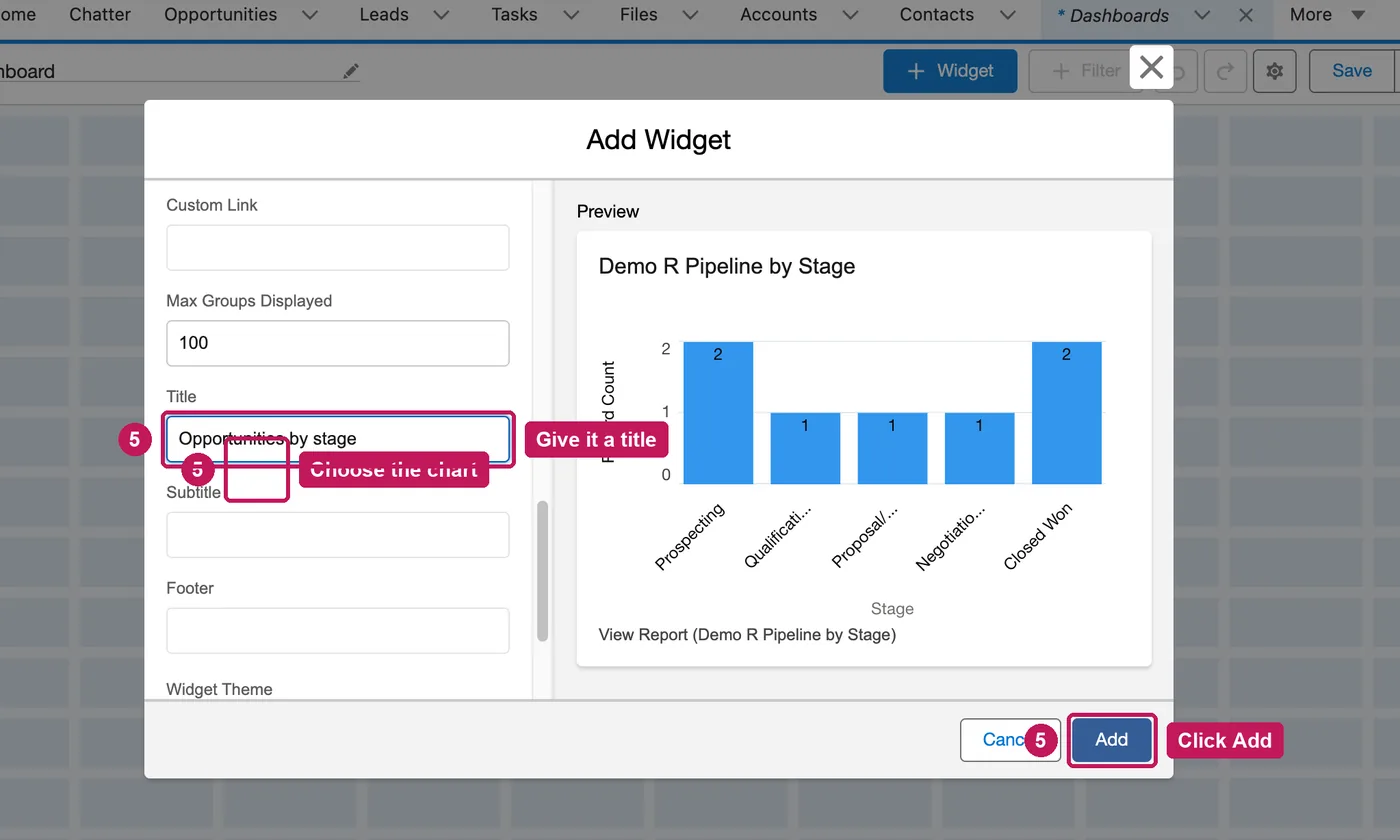
- Choose the chart type, give the widget a title and click Add.
- Click Save, then Done.
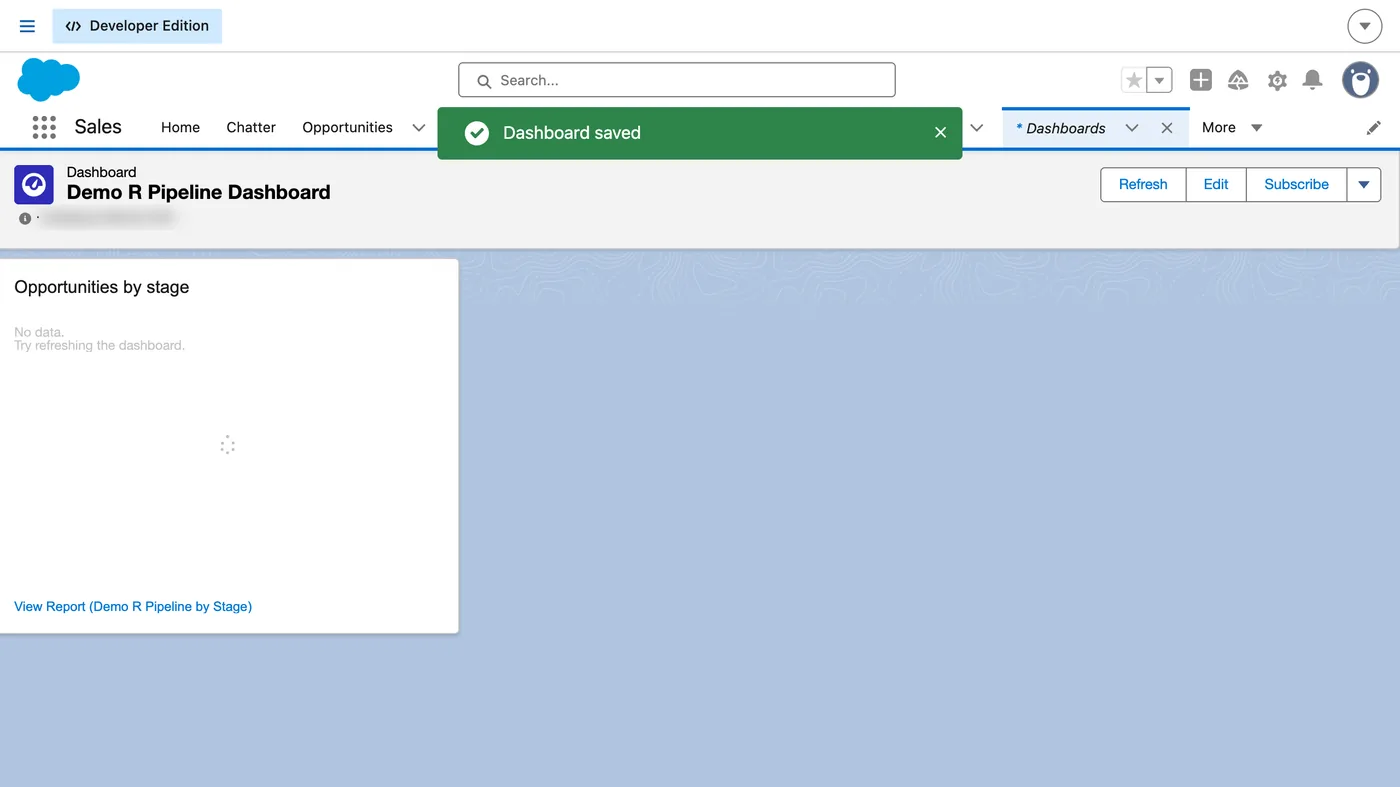
Every widget takes its data from one source report, and different widgets can use different reports, so build the reports first and keep them in folders your dashboard viewers can open. A widget can be a chart, gauge, metric, table, text or image. New dashboards are saved in Private Dashboards unless you choose another folder.
Source: Salesforce’s Build a Lightning Experience Dashboard help article, checked 22 September 2026.